ILP Live Documentation
ILP Live is our fully customisable ILP Builder. You can use it to extend your existing ILP or use it completely stand alone.
Firstly you can build your own student menu. This menu can be up to 3 levels deep. For each page you can decide the text, colours, icon, permission access etc.
Pages can be found quickly using the search functionality.
Then on each page you can add your own sections. This section can be an editable form which saves data of your choice against the student. You can add inputs to each form. For each input you can decide the label text, input type, whether it is required or not, permissions of who can view or edit.
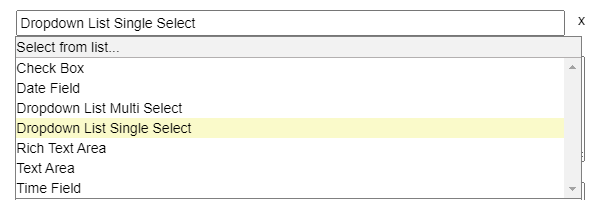
Input types include text, rich text, configurable dropdown list, check box, date, time or number.
This is hugely configurable and the college can use this to design most types of forms for a student. For example:
For each input form you can decide whether one record can be saved or multiple records. When choosing multiple records the input form will turn into a grid where the user can add/edit new rows of data. This is hugely configurable and the college can use this to design most types of forms for a student. This data can be added in bulk by the tutor against one or more students within a group for example a SMART Target for all students. The sort of pages this could be used for include:
As well as editable forms you can embed the following into a page:
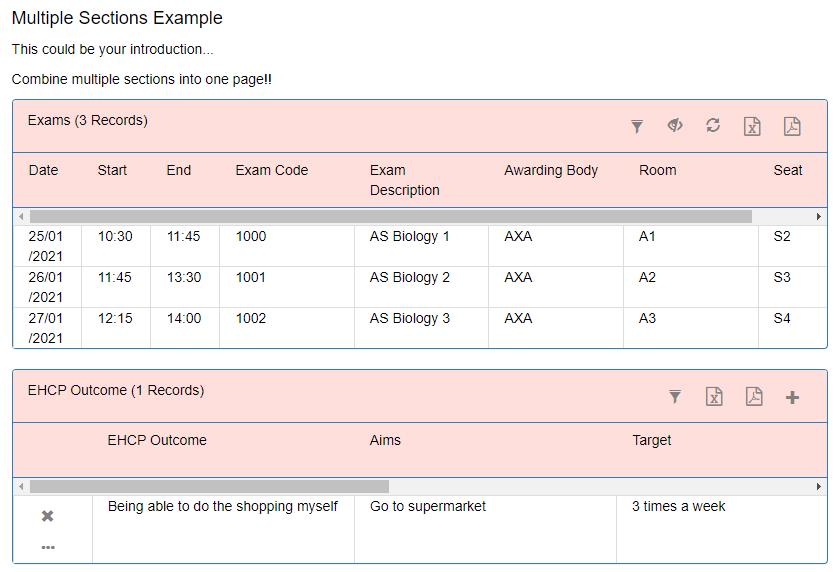
You can combine multiple sections on each page. So you could have a page with an introduction text followed by a datagrid followed by an input form etc.
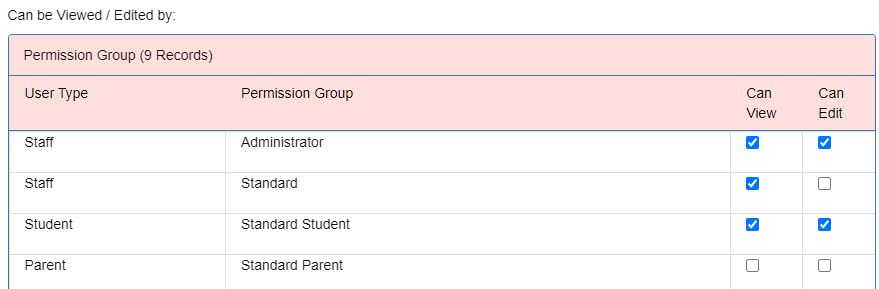
For each page you can decide who has access and who can edit. For example a page could be made just for staff to view and edit. Or a page could be made that students can edit and staff could view read only. Or a page could be made that parents could view. This can all be decided by the college. Different ILPs can be created for different types of students. For example FE students could have a different ILP to HE students.
Once data has been submitted using the form builder you are going to want to report on it. Using our reporting tool you can see all the student data entered for each form. And the tool will automatically provide valuable insights into your data.
Any page you build within ILP Live can be embedded directly within your existing ProMonitor ILP for staff, or your existing ProPortal ILP for students. This provides a seemless experience for users who will be able to view any ILP Live page without leaving ProMonitor or ProPortal.
ILP Live comes in 3 sizes depending upon how many pages the college needs to build:
ILP Live compromises of the following main components: a Website, a SQL Server database and a Windows Service
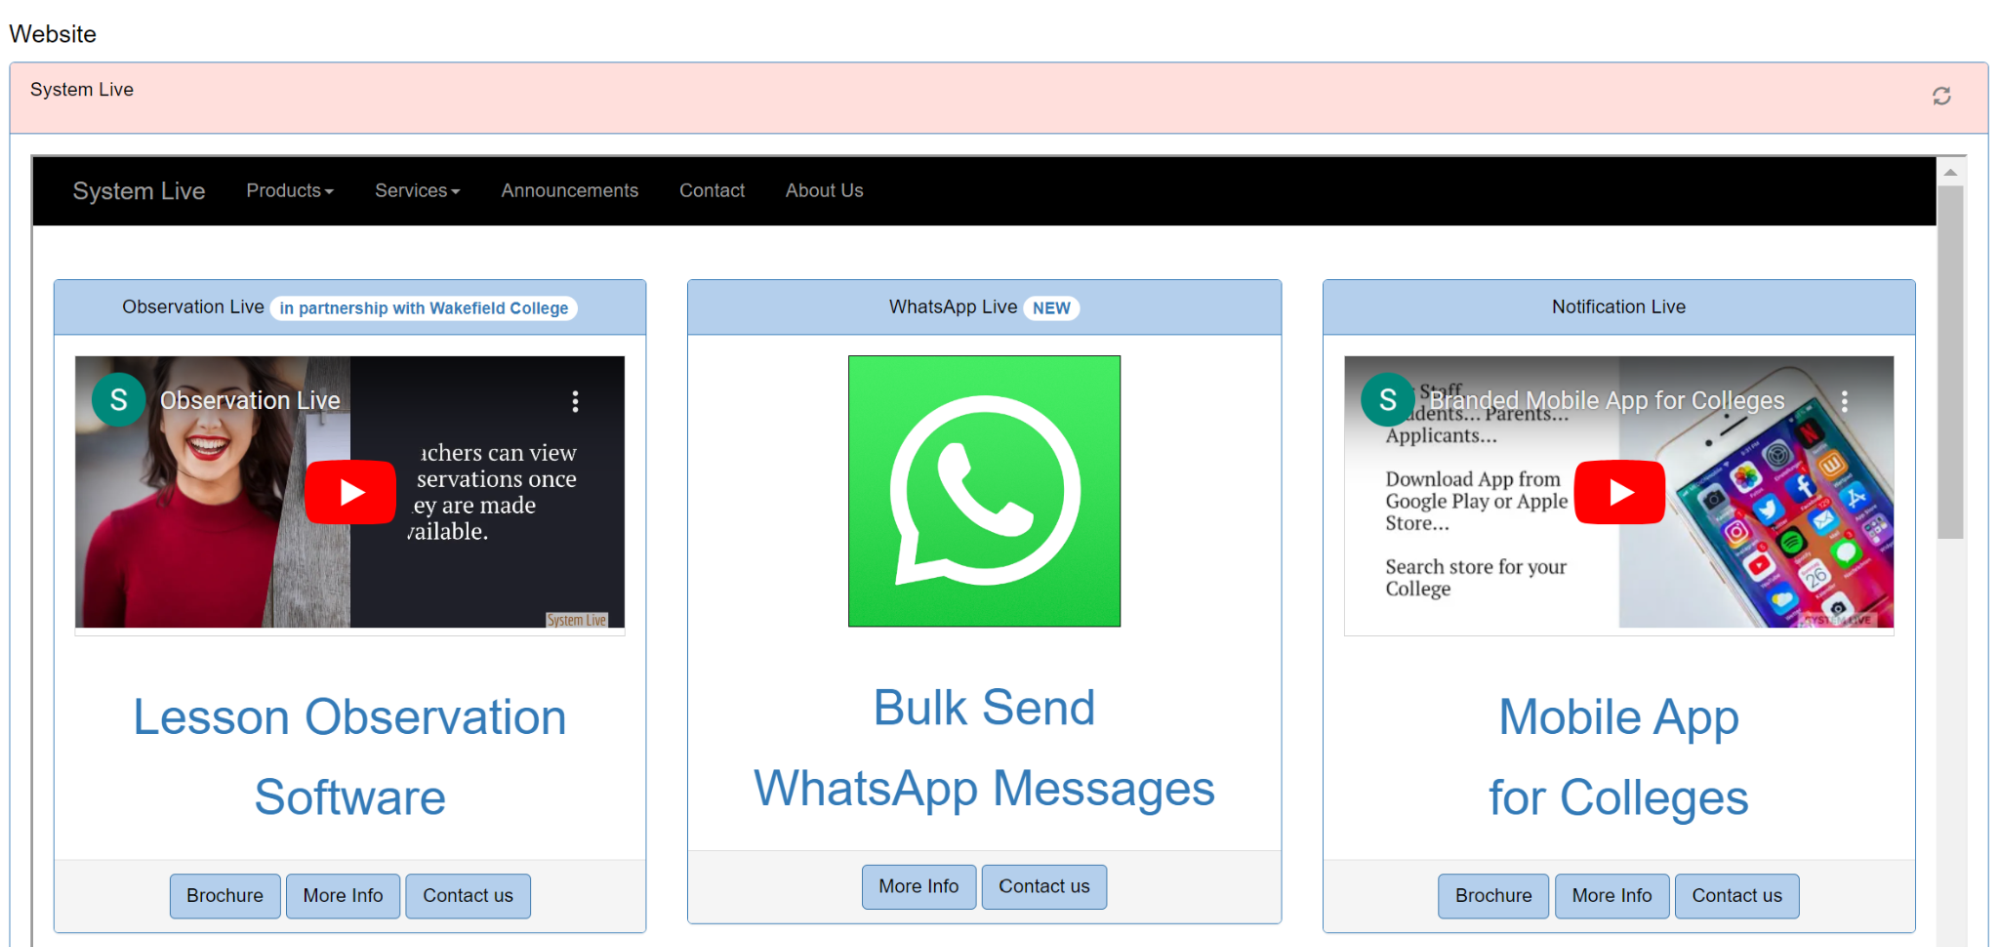
Website
The website provides the front end of the system where all staff, students or parents will login to access. This website can be hosted locally on the college’s intranet and/or made available externally. Typically the website can be accessed from a url which appears as follows http://ServerName/CollegeLive or www.college.ac.uk/CollegeLive. Colleges will often embed this link on their intranet page for a seamless experience.
Prerequisites
Windows Server 2012 or above
IIS7 or above
10 GB Hard Drive
3Ghz Quad Core Processor
8GB RAM
.NET 4.6.2 Installed
Please note that hardware requirements are estimates and may be higher or lower depending upon the volume of concurrent users. Additionally if the server has other systems installed that are taking up resources then the resources available to the system may be considerably lower. Please contact support if unsure.
Database
The data behind the system is stored within a SQL Server Database.
Prerequisites
SQL Server 2014 or above
100 GB Hard Drive
3Ghz Quad Core Processor
8GB RAM
.NET 4.6.2 Installed
Please note that the Website and Database can be hosted on the same server. However the resources required will be higher to accommodate this.
Windows Service
The Windows Service known as the Process Agent will perform background processes required by the system. This includes scheduling data to be imported into the system and sending messages.
Installation
The Installation Wizard should guide the users in how to install the Website, Web Service, SQL Server Database and Process Agent.
Configuration
Once installed there are various steps required before using ILP Live. This outlines the minimum steps required but other steps might be needed.
User Authentication
The college will need to decide how they want users on the website to be authenticated. There are 4 methods:
In order to use windows authentication the following settings are required in IIS. Under the website navigate to authentication. Make sure that ASP.NET Impersonation and Windows Authentication are turned on, and that Anonymous Authentication and Forms Authentication are turned off.
In order to use any of the other authentication methods the following settings are required in IIS. Under the website navigate to authentication. Make sure that Anonymous Authentication and Forms Authentication are turned on, and that ASP.NET Impersonation and Windows Authentication are turned off.
The system ships with a default administrator account with username: administrator and password: Password. This should be altered as soon as possible to have a password of your choice.
User Access
The college will need to decide who will be able to access the ILP. Staff, Students or Parents or other permission groups. If the college wants to have different ILPs for different students then different Student permission groups will need to be set up e.g. HE, FE, etc.
Imports
The system requires data from other systems to be used. At a very minimum staff/users and students need to be imported with the staff and student import. Other useful imports include:
Menu/Page Builder
The college will need to decide what information to show in the ILP. ILP Live comes with a Page Builder which mostly requires no technical expertise (some areas may require SQL knowledge).
The page builder allows the college to build menus up to 3 levels deep and decide on the text, colour and icon for each menu. The college can build different menus for each type of student and decide whether the page will be accessible for staff, students or parents.
The college can decide the information to show on each page. Options include:
Please see the Page Builder section for more details.
Embedding Pages in ProMonitor/ProPortal
Any page created within ILP Live can be directly embedded within the ProMonitor ILP (for staff) or ProPortal ILP (for students)
Online Demo
There is an online demo for ILP Live which can be found here http://www.demo.system-live.com
This can be useful to see an example of how the system can be configured. This can show you sample ILP pages. The system can be logged in with different types of users.
To access the demo site the following credentials should be used.
Type of User: Administrator
Username: Administrator
Password: Password
Type of User: Head of Campus
Username: Kady.McPhee
Password: Password
Type of User: Head of School
Username: Linzi.Stephenson
Password: Password
Type of User: Head of Department
Username: James.Morris
Password: Password
Type of User: Teacher
Username: Felicity.Jones
Password: Password
Type of User: Student
Username: Karen.Nelson
Password: Password
Type of User: Parent
Username: Parent
Password: Password
Please feel free to try out the demo site and edit information. Please note that the demo site may be regularly reset so any changes will be lost.
ILP Live has many General Features used throughout. Please see the General Documentation for more details.
Please see the General Documentation for more details.
Staff and students access the Student ILP in slightly different ways.
Students will see the ILP menu immediately when logging into the website. If a parent or another type of user has multiple students they will be able to select the individual student.
Staff will be able to access each student’s ILP in different ways:
Once the user is on the student details page they can navigate to the ILP tab.
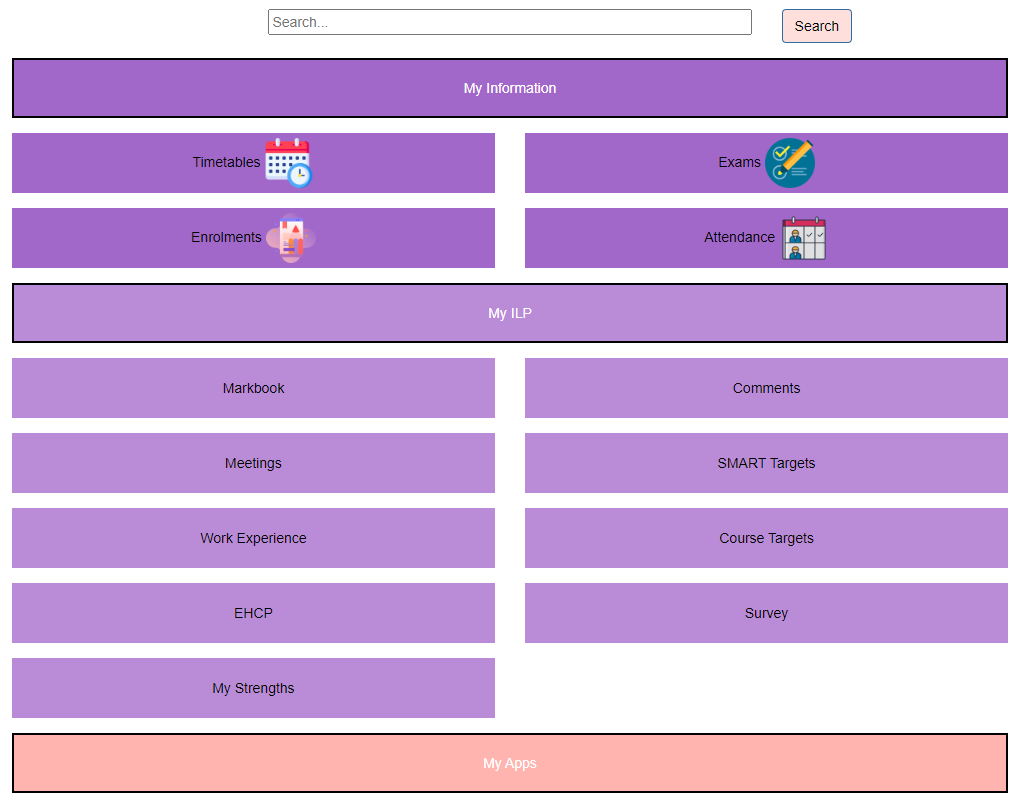
The ILP tab will display a menu. Clicking each menu item will take the user to the specific page. Once on a page the user can navigate back up the menu. Menus can be up to 3 levels deep. Both the menu and the information on each page are highly configurable by the college.
The search box will let the user restrict the pages displayed e.g. lesson may show the timetable page.
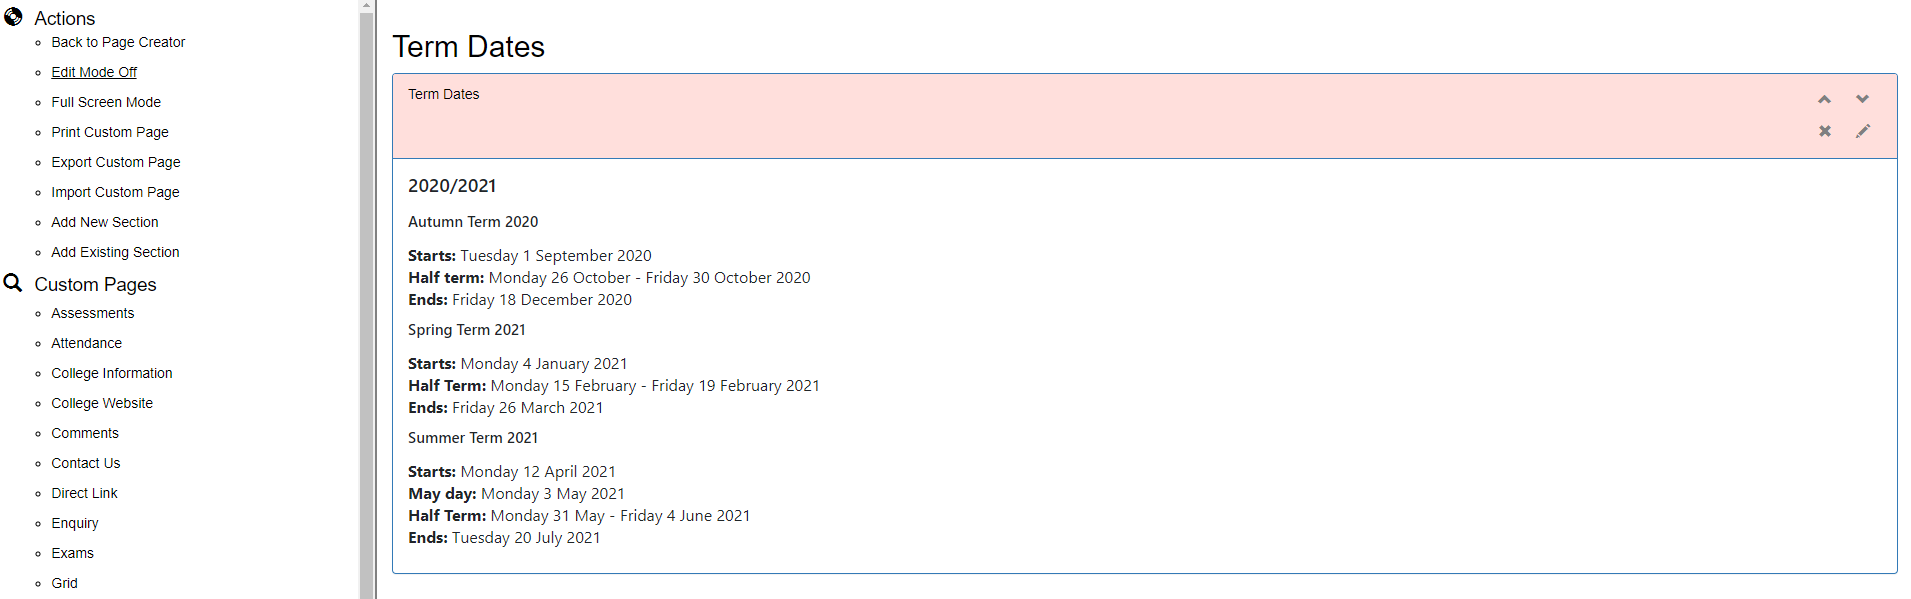
Each page can show the following types of sections:
Pages can be printed out in a neatly formatted pdf by clicking the ‘Export Page to PDF’ button at the top of each page.
Pages can have multiple sections. For example a rich text section followed by an editable section followed by a data grid.
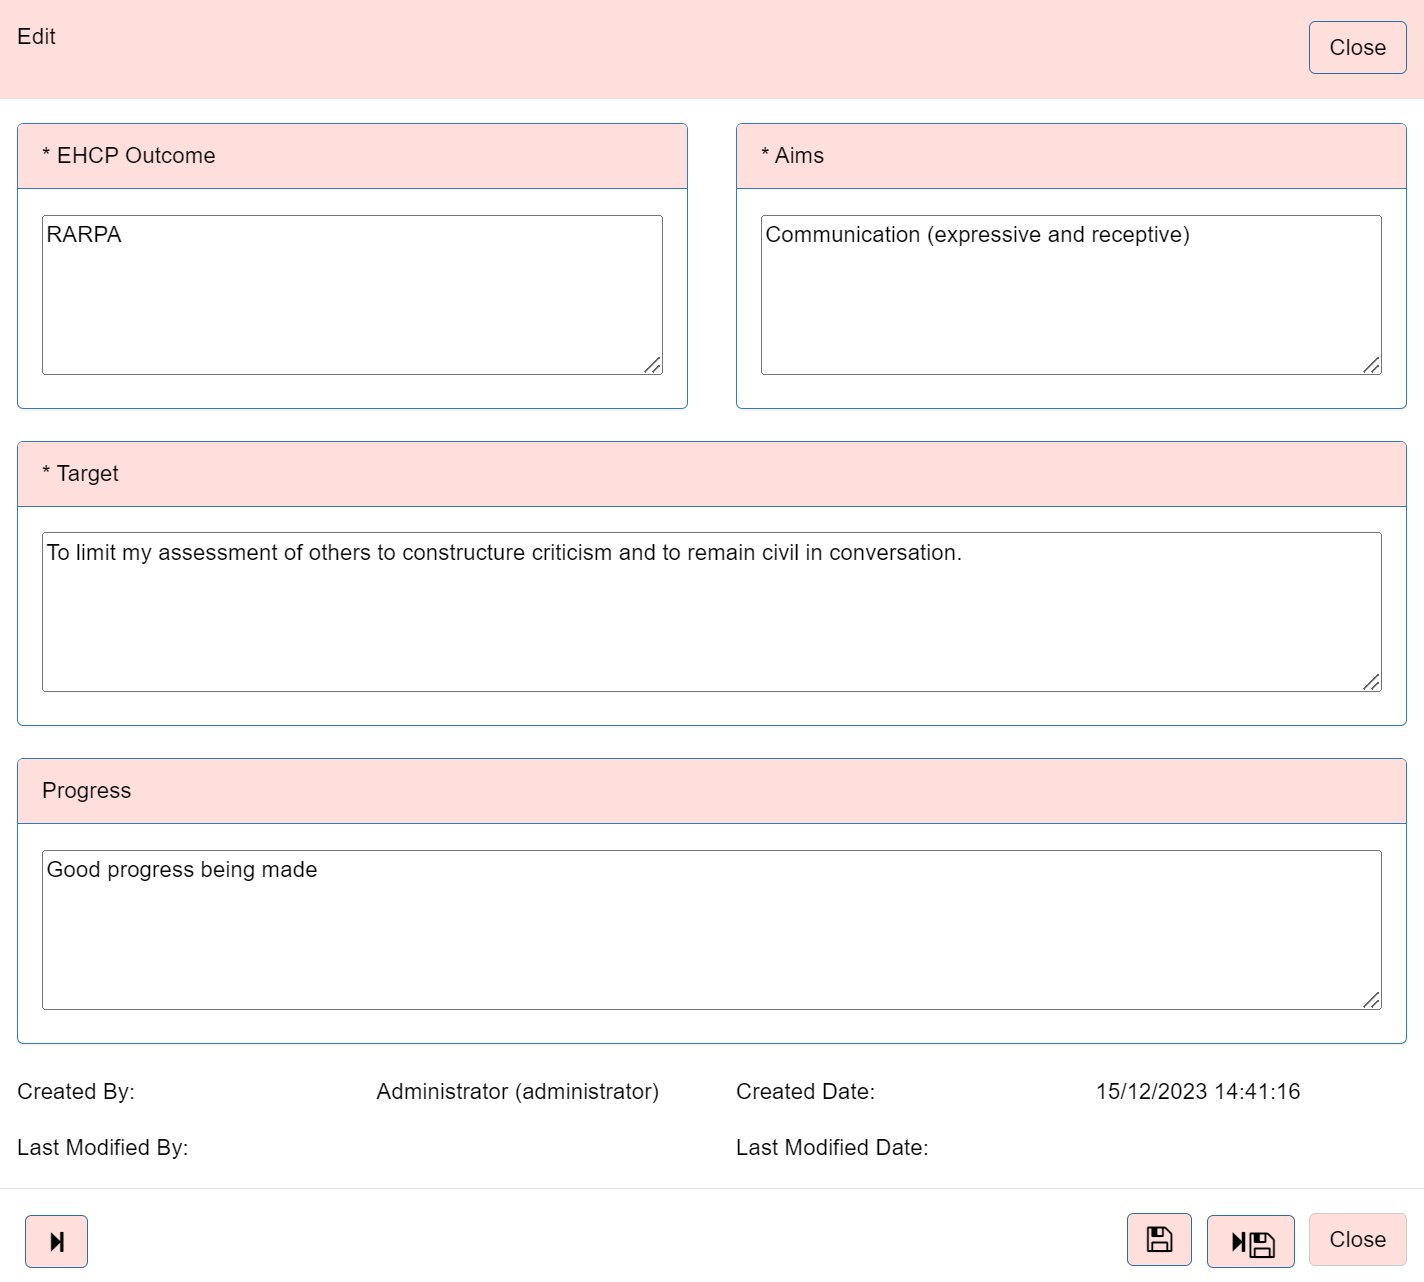
Editable Section
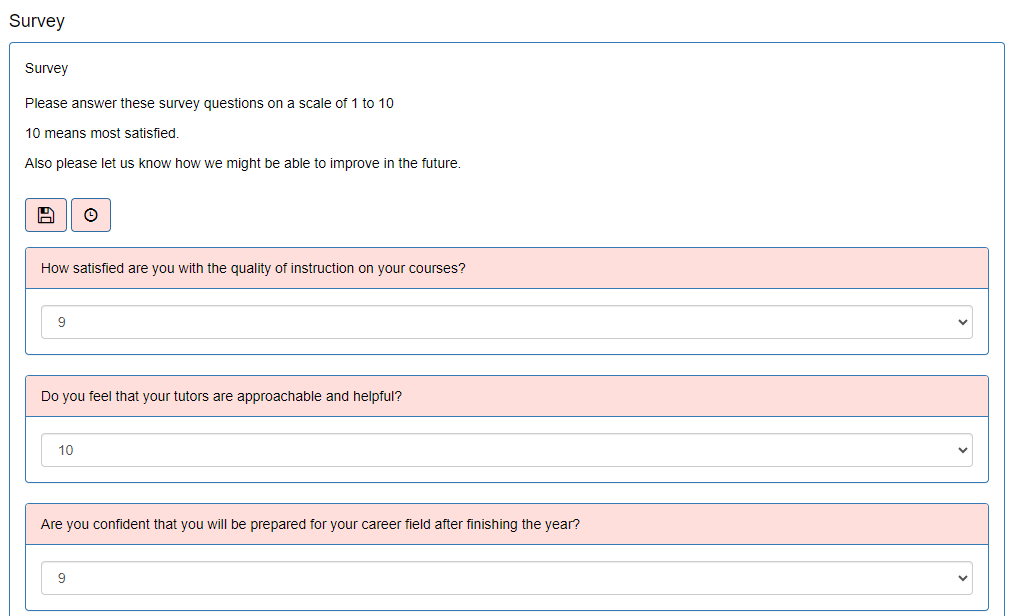
There are two types of editable sections. The first one is where there can only be one entry for each student. The second one is where there can be multiple entries for each student.
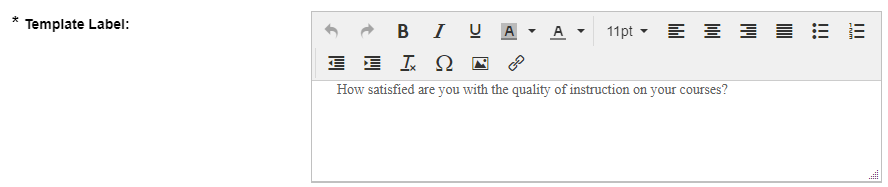
If there is one entry for each student there will be a series of inputs with a save button on the top of the section. These inputs can be:
Whether each input can be viewed/edited can be altered for each permission group. So your user may not be able to view or edit all possible fields. If you cannot edit any fields the save button will not appear.
Next to the Save button an audit button will show who created the record, when the record was created, who last edited the record and when the record was last edited.
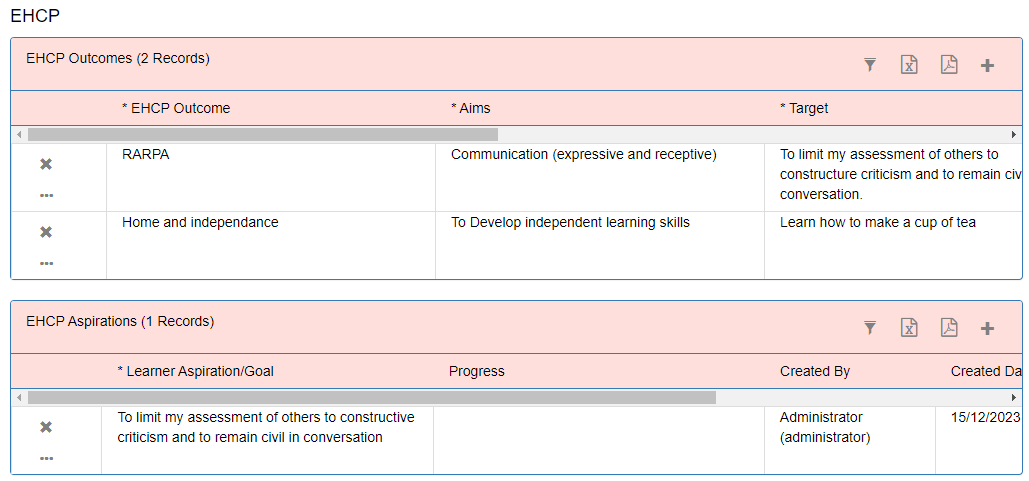
The second type of input field is whether there can be multiple entries for each student. These appear as grids of data.
New records can be added. Existing records can be deleted or edited. Adding/Editing will open up the input areas within a popup. Note that in order for the user to be able to add/delete data they will need permission to edit the first input.
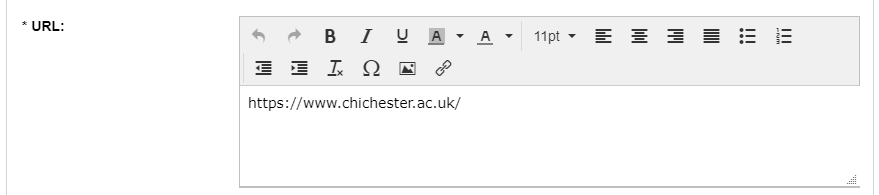
Hyperlink
When clicking these pages the user will be taken to a website which will open in a new tab.
Embedded Web page
The webpage will open up directly within the page.
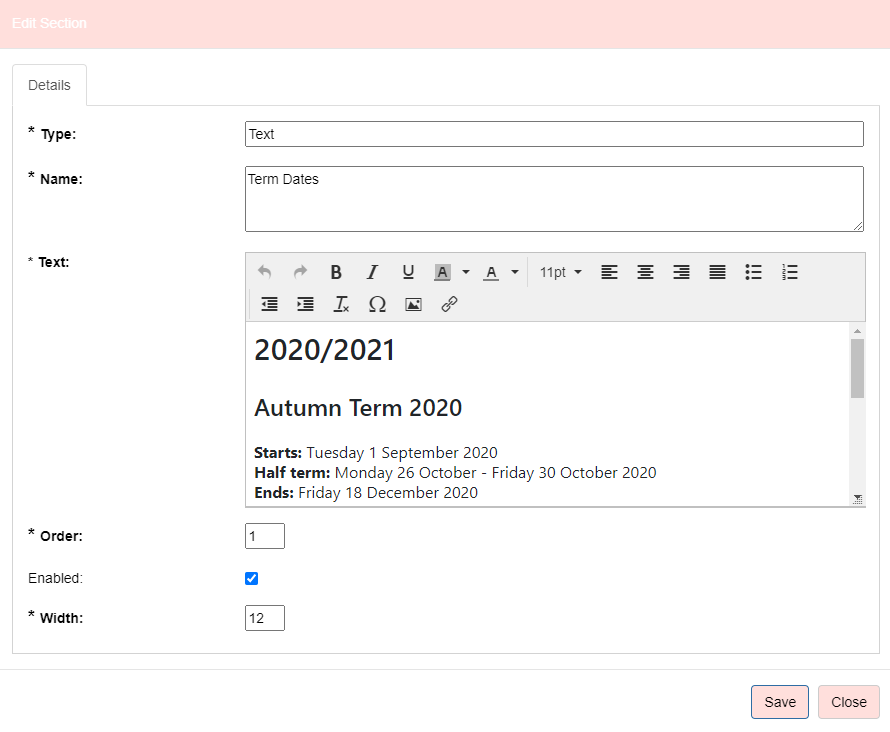
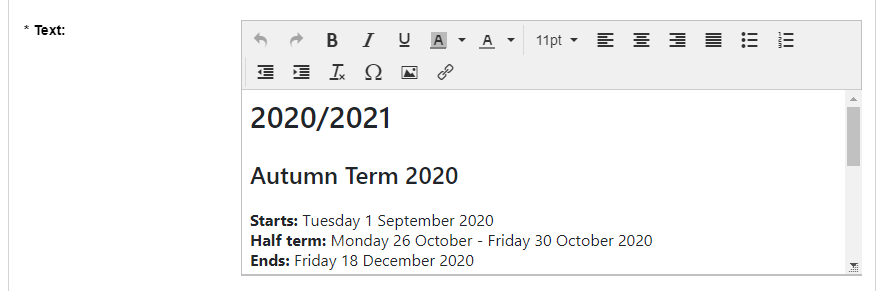
Rich Text
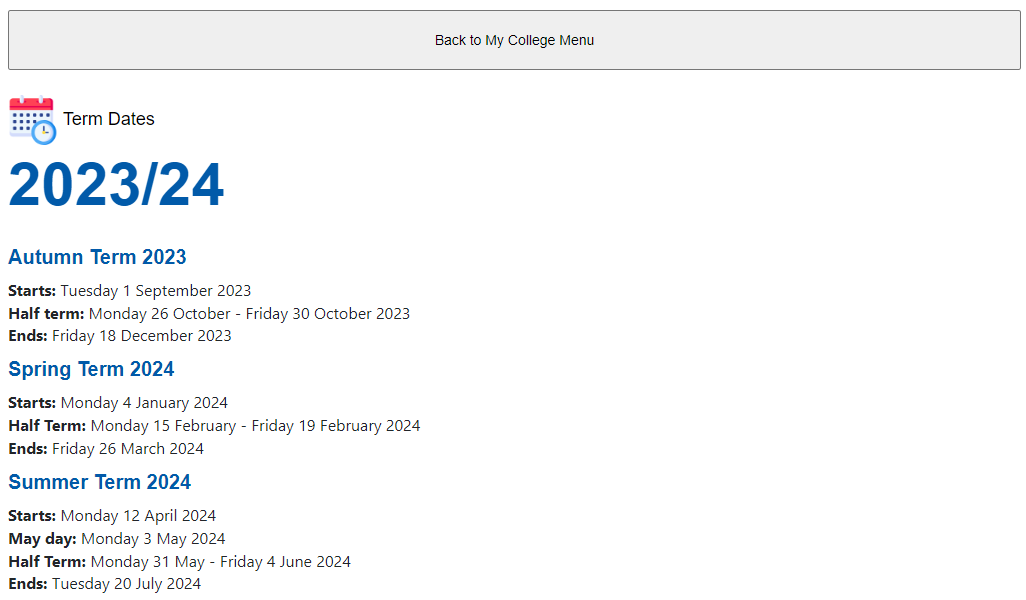
This section will show Formatted text within the page. This may contain images or hyperlinks etc.
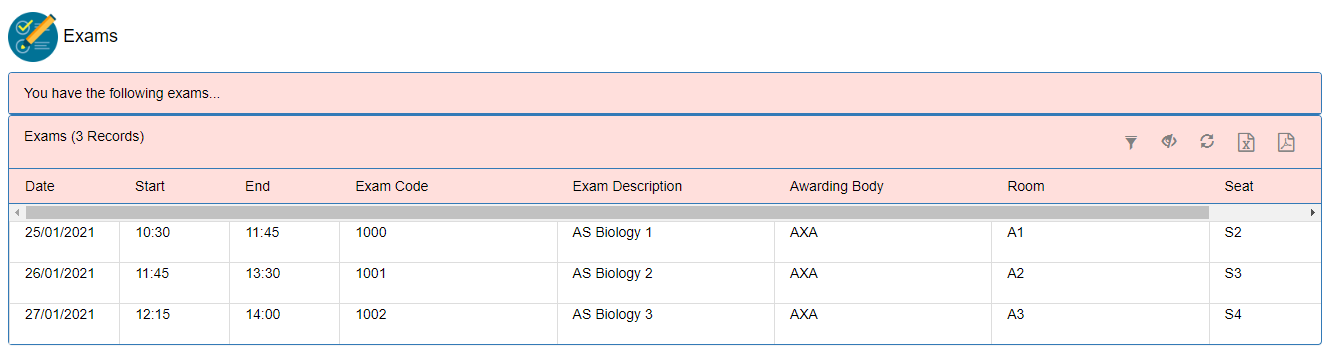
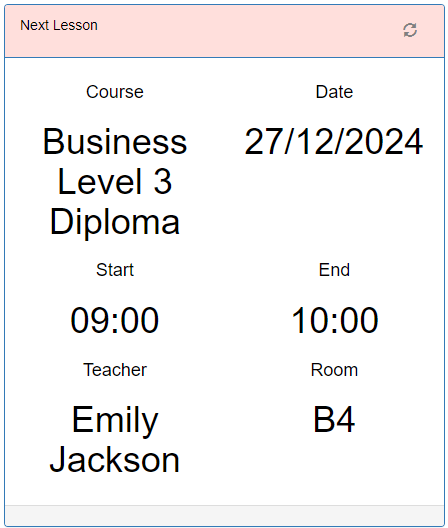
Data Grid
This will show readonly information from a different system for example a timetable grid or exam grid etc.
Grids can be sorted/filtered/exported as required.
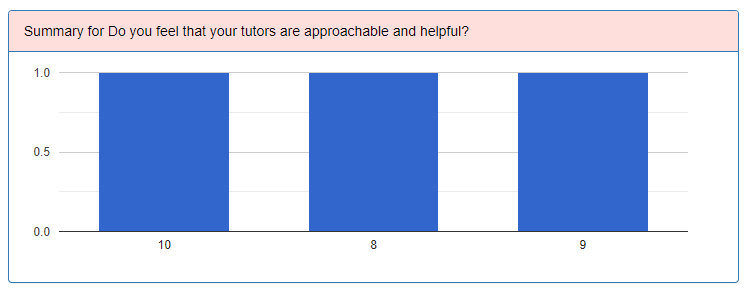
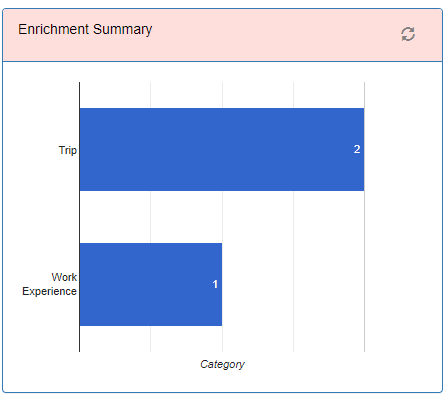
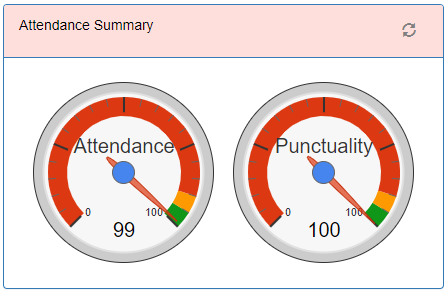
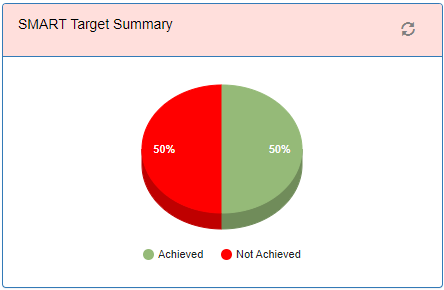
Charts
Visually display data from different systems in multiple ways.
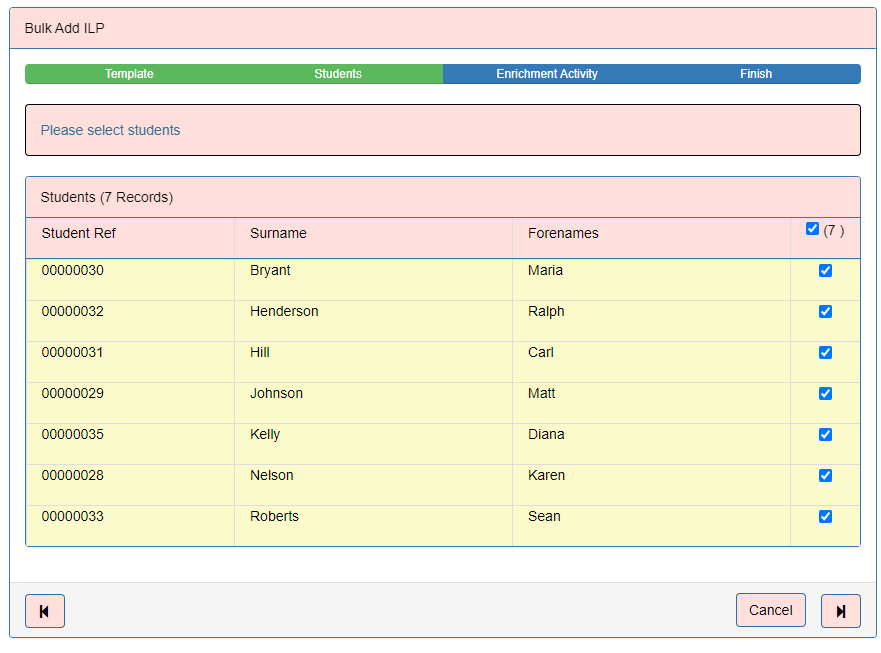
The Group Details side panel contains the action ‘Bulk Add ILP’. This lets the user add an Editable Section for one or more students within the Group e.g a SMART Target or Enrichment Activity. Clicking the action opens up a wizard to guide the user through the process.
The steps of the wizard are as follows:
The action ‘Email Students’ appears on the side panel. When clicked this will open up the default mail browser with all the email addresses of the completed or continuing students within the group appearing in the ‘To Address’.
The ILP tab allows:
Select one or more pages and a student then click search to view the page(s). Click the export to pdf icon to export the pages.
The ILP summary tab shows an overview of the editable section templates for each student within the group.
ProMonitor/ProPortal
Any page in ILP Live can be embedded within ProMonitor or ProPortal.
Within ProMonitor the Custom Page should have the following URL.
WebsiteRootURL/Search/StudentDetail?AcademicYearCode=<AcademicYearID>&StudentRef=<LearnerRef>&Tab=ILP&Page=PageName
For example say ILP Live was hosted at https://ilplive.college.ac.uk and the ILP Live page was called ‘Timetables’ then the url would be as follows.
https://ilplive.college.ac.uk/Search/StudentDetail?AcademicYearCode=<AcademicYearID>&StudentRef=<LearnerRef>&Tab=ILP&Page=Timetables
Within ProPortal the Custom Page should have the following URL.
WebsiteRootURL?AcademicYearCode=<AcademicYearID>&StudentRef=<LearnerRef>&Tab=ILP&Page=Timetables
For example say ILP Live was hosted at https://ilplive.college.ac.uk and the ILP Live page was called ‘Timetables’ then the url would be as follows.
https://ilplive.college.ac.uk?AcademicYearCode=<AcademicYearID>&StudentRef=<LearnerRef>&Tab=ILP&Page=PageName
Under the System Menu. This facility allows the colleges to create their own menu structure and decide what appears within each page. Different pages can be set up for different permission groups so for example students could see different information to parents.
The main page screen shows all the pages in the top level of the menu. The college can have up to 3 levels of menu. 2nd level menu items can be added to 1st level menu items. 3rd level menu items can be added to 2nd level menu items.
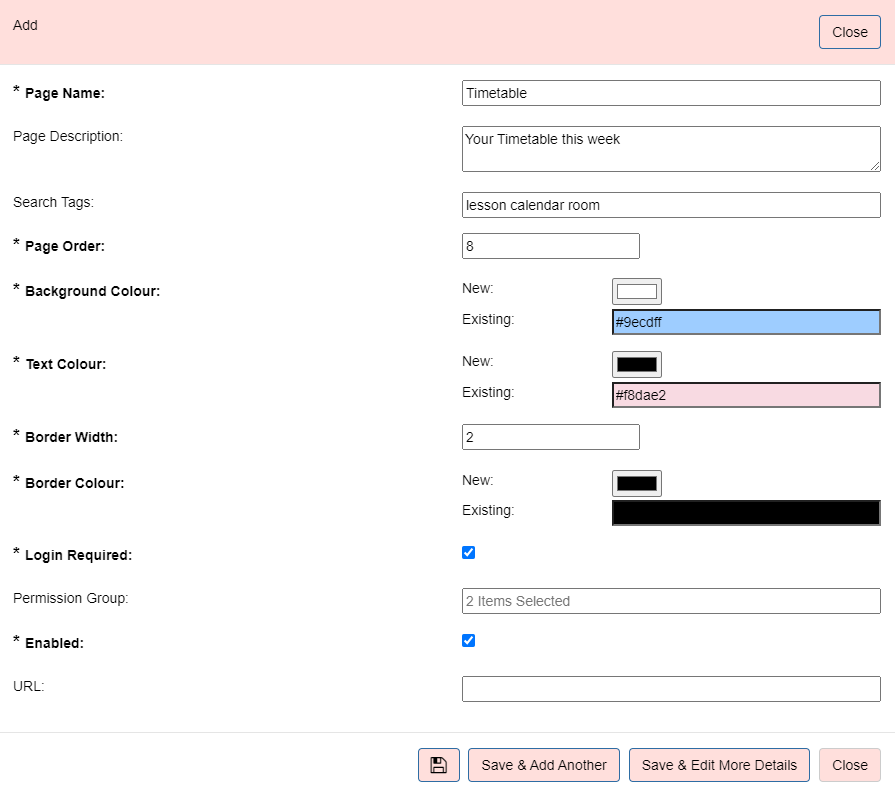
Adding New Pages.
Clicking + will allow the college to create a new menu item.
The main grid allows the user to:
The side Actions Panel allows the user to:
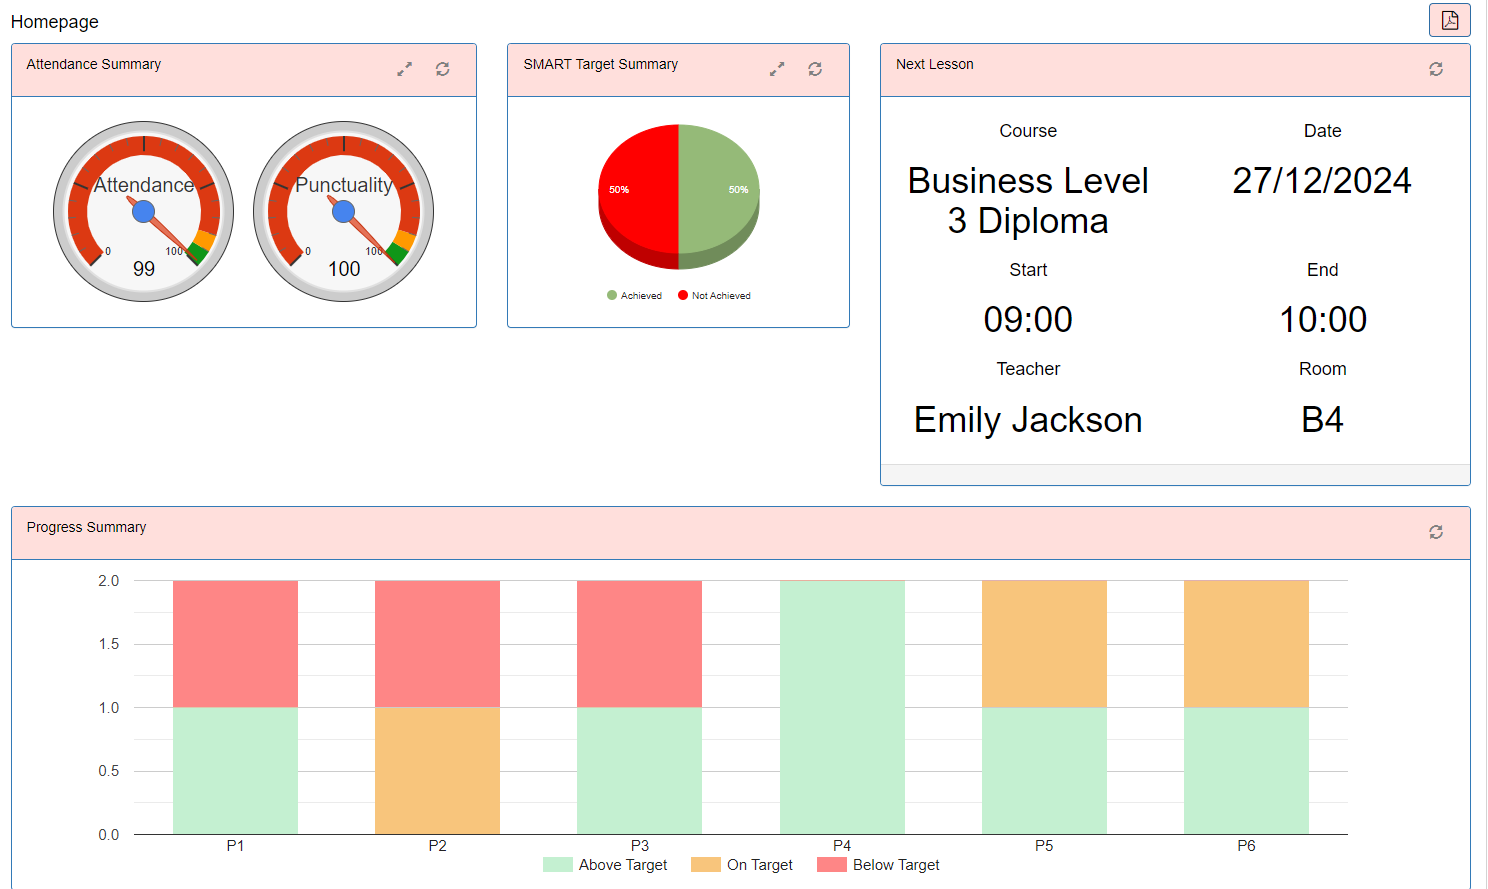
Homepage
The Homepage tab sets the page which will be first loaded when the user opens the ILP. Different permission groups can have a different homepage set.
If no homepage is set for the permission group then the main menu will be loaded.
Search Text
The Search Text tab will show a list of all the search terms searched by users.
This will allow the college to see searches that are being made that do not result in any hits. The college can then potentially add search tags or create new pages to accommodate this.
Page Details
Once the page is created allows any of the above options to be altered.
In addition the user can add an icon to the page which appears alongside the text in the app.
The Side panel Action called ‘Move Page’ allows the page to be moved around to sit within a different page within the menu. Firstly choose which Page Level to move to - either 1,2 or 3. 1 is the root of the menu. If choosing 2 or 3 then choose the Level 1 or Level 2 page where the page will now sit within.
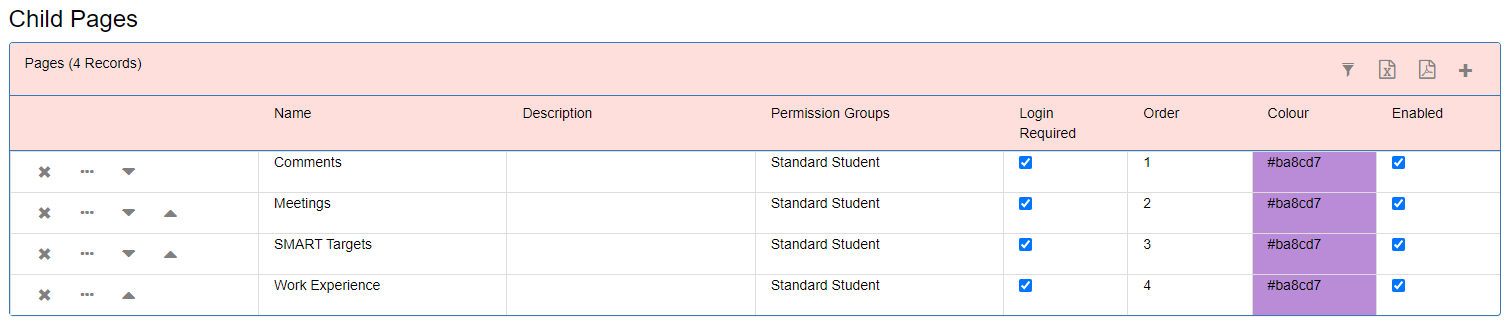
Child Pages
This section allows the users to see any pages which live within the higher level page.
From here new child pages can be added and existing ones altered.
Here we can see an example 2 level menu structure.
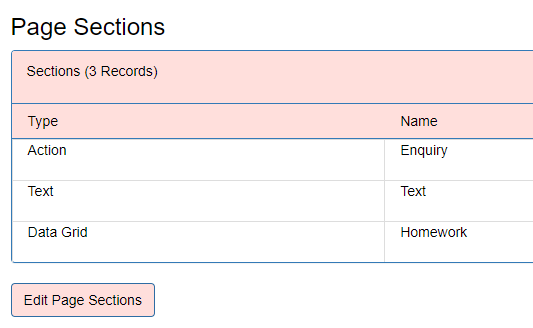
Page Section
This part shows the sections which live within the page and allows the page sections to be edited.
This part of the system is very flexible. Different types of sections can be added here.
Clicking to edit page sections will take the user to another page.
This will show all the editable sections on the page.
From here new sections can be added by clicking ‘Add New Section’ in the Action Panel.
There are many things you can do here.
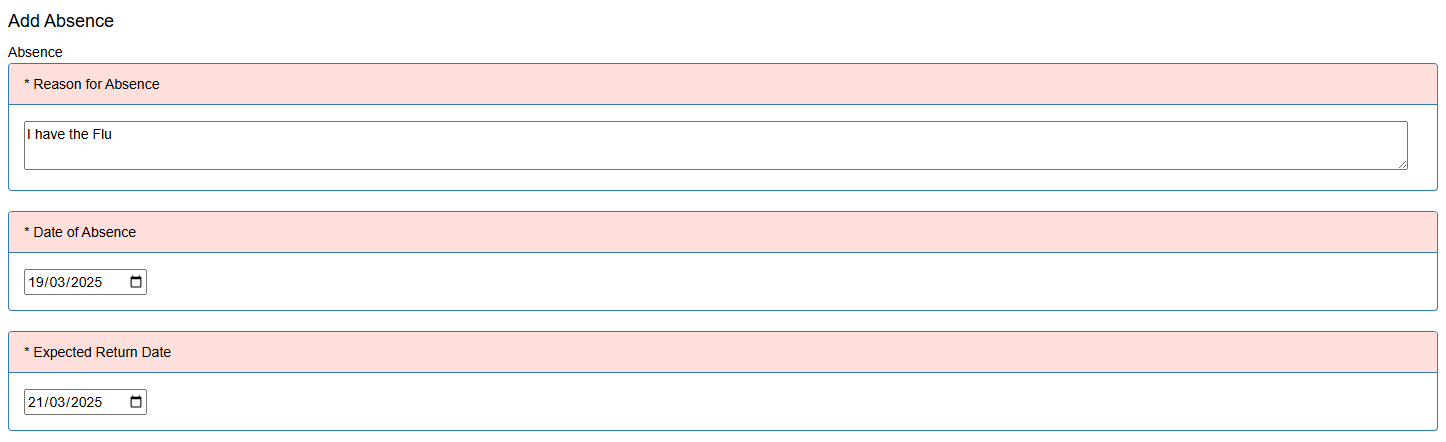
Editable Section
Data Capture form to store data against a student.
There are two types of editable sections. The first one is where there can only be one entry for each student. The second one is where there can be multiple entries for each student.
Resources can also be added to the record if the template has the ‘Allow Resource’ option checked.
For building ‘Editable Section’ Templates please see the General Documentation.
Web Page
The webpage will be embedded on the page within the ILP.
Text
Data Grid
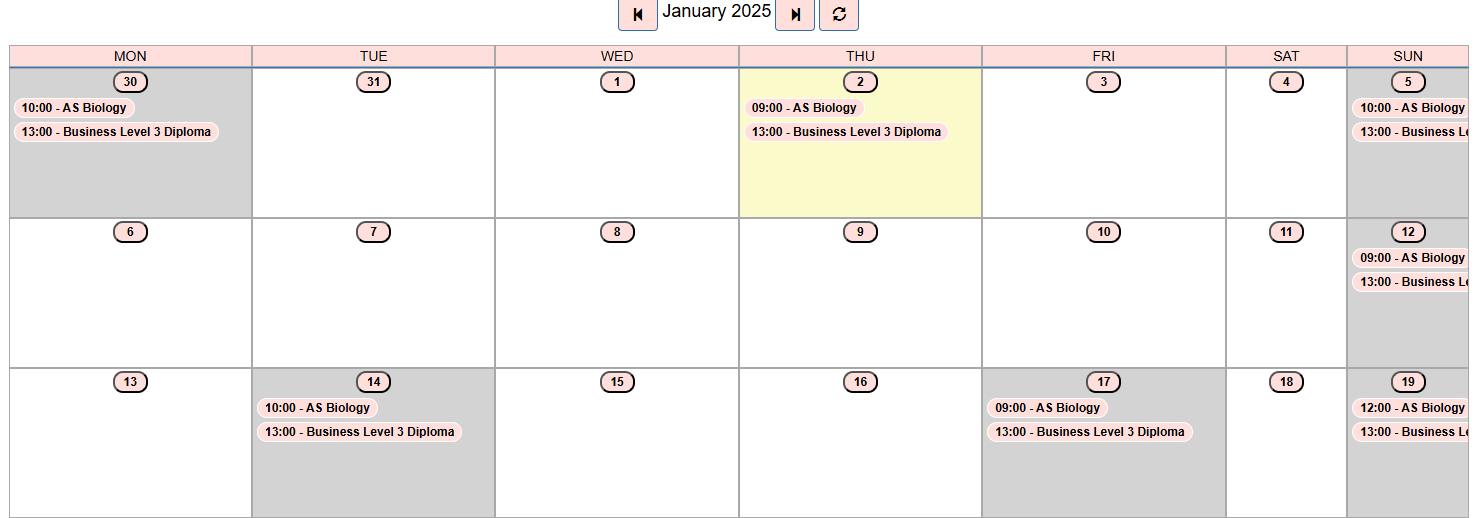
The month can be scrolled by clicking back and forward. Any dates with data against them will appear with a grey background. A date can be selected by clicking it and then clicking search. The selected date will appear with a yellow background. This is very useful for showing any date based data e.g. timetables, exams,etc.
If the SQL returns a Time column then the first time column will appear in the calendar. If the grid contains a Varchar or Char column then the first column of this type will appear in the calendar as a description.
Chart
Details Tab
Actions
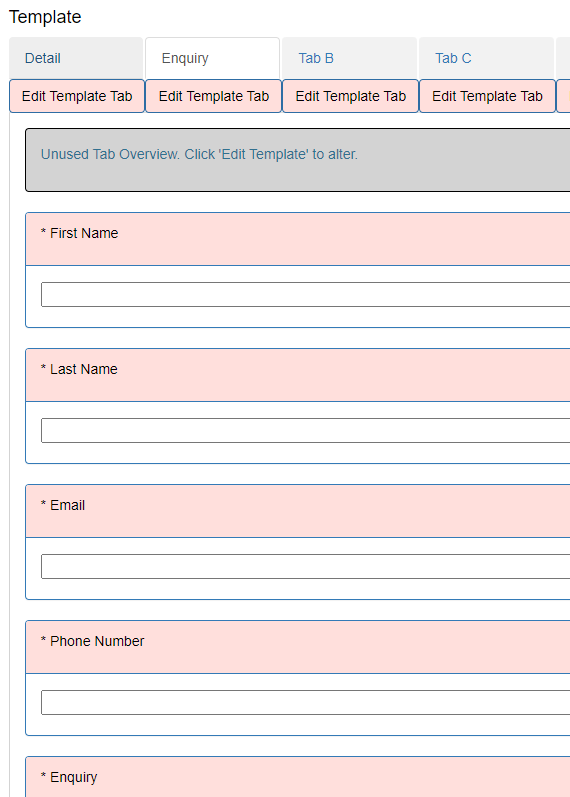
Actions allows for input forms to be created which come back into the system as actions for a member of staff to complete. Examples could include enquiry, absence forms, work experience forms.
Building Action Type - Please see the General Documentation for more details about creating action types.
The Action Type contains 3 customisable tabs A - C where the college can define input types.
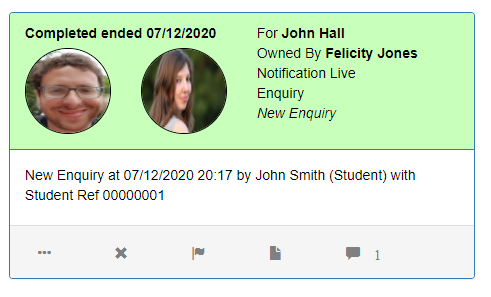
When actions are submitted from the App they come through as Actions…
These can be reviewed by members of staff and actioned as appropriate. Please see the General Documentation for more details about Actions. Action Types can also be configured to have a default ‘For’ and ‘Owner’ so that if a member of staff is incharge of ‘Enquiries’ these can be automatically set against them. Also the Action type can be set to automatically send a message to the staff member so they know a new enquiry has come through.
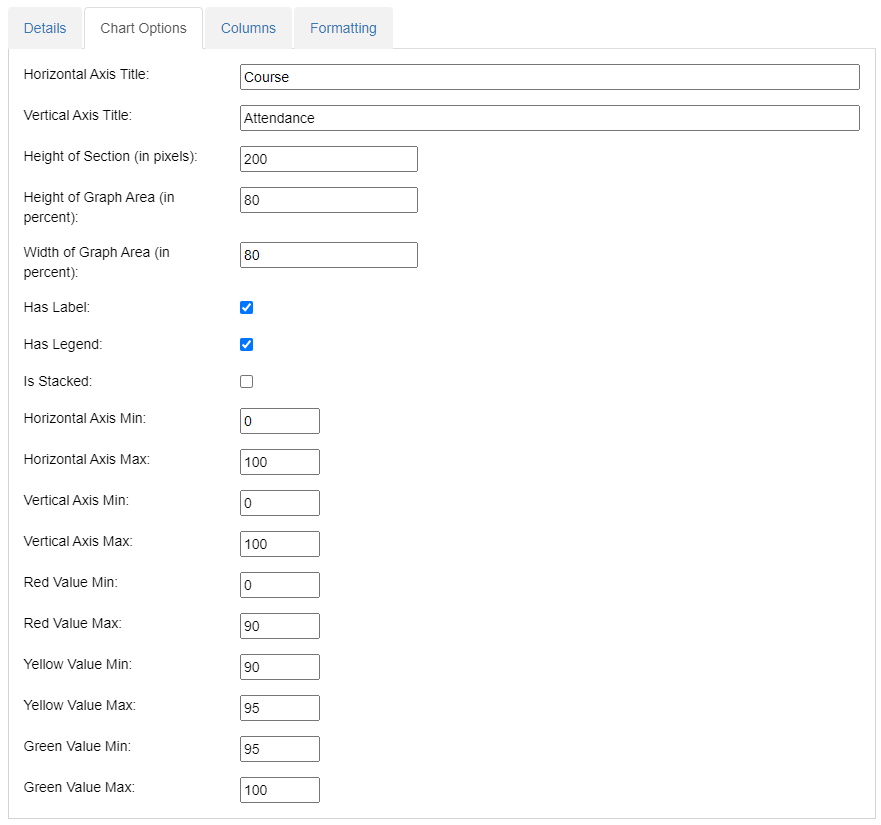
Chart Options Tab
Not all options are relevant to all the different chart types
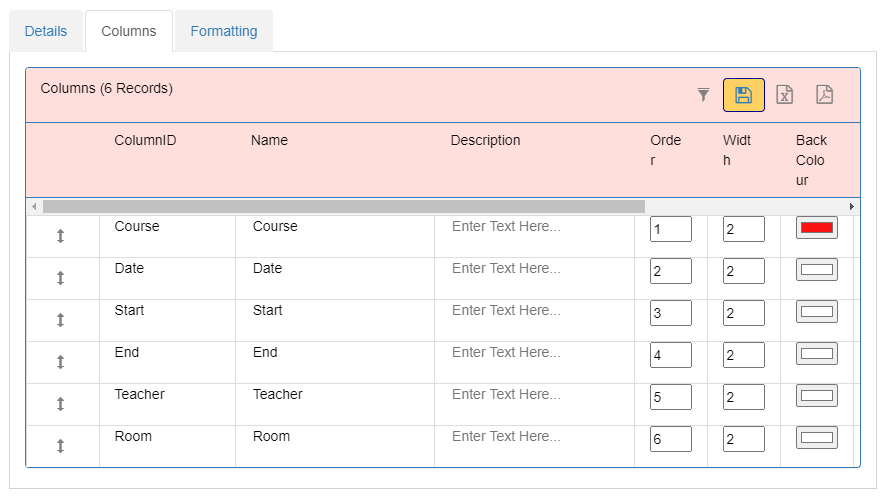
Columns
Not all options are relevant for charts
Formatting
The formatting tab allows the Colour of the chart segments to be dynamically determined by another column. For example you may return an html colour in the sql and use this to automatically change column colours. For Headline Types the Text Colour also works.
The ‘Ask AI’ option is available on the Student Detail Action Panel. This will allow the user to ask questions about the student e.g. What action would you suggest for this student to improve at the college?. In order to use this functionality the user needs to have the permission 'Can Use AI Student’ and the Gemini AI needs to be configured under System > Gemini AI. To include an ILP page to be queried by AI there is a flag against each page called ‘Use For AI’ within System > Page Creator.
The Calendar shows Editable Sections on a calendar. Please see the General documentation for more details.
The user can decide which information to show within the calendar or not show the information at all.
Templates are used for building Editable Sections and Action Types to place onto ILP pages. Please see the Templates section in the General Documentation for more information.
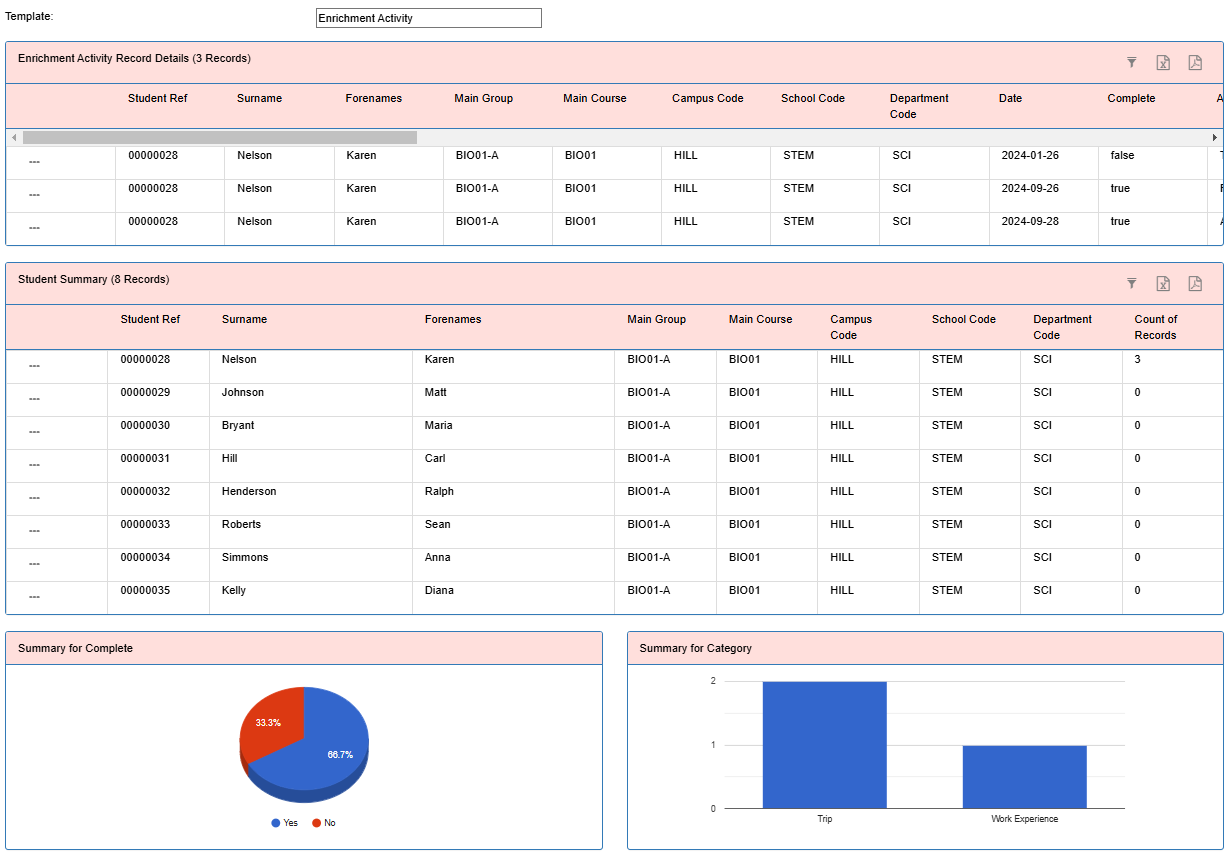
Template Reporting is available under the Reporting menu. This allows a college to easily report on any Editable Section template that has been created. Under Template Type select Editable Section. Then choose the Template.
This shows several sections:
Allows users to be added, details changed and associated to permission groups. Can be used to set up and email passwords.
Allows Permission Groups to be created or altered.
Permission Groups are useful so that different types of users see different pages in the ILP. See the Page Builder section for more details. The system ships with default permission groups - Staff, Students, Parents, However your college may wish to have other groups of users. For example perhaps splitting out students into FE and HE students and giving them different sets of pages in the ILP.
Please see the Permissions section in the General Documentation for more information.
Sets up connections to SQL Server Databases used for Imports, Message Creator and Dashboards.
Import data into the system.
Course/Group
Populates the system with courses and teaching groups which sit within the course. This allows users to see all students within a group or a course.
Enrolment
Recommended if the college wants to see student’s enrolments. Also required if users want to see students with a group or a course.
Organisation Structure
Imports Organisation Structure and their Managers. Up to 4 levels can be imported e.g. Campus > School > Department > Team. This is useful for reporting and for the managers to keep track of their area.
Organisation Structure Course
Imports the courses assigned to each Organisation Structure.
Organisation Structure Staff
Imports the Staff members assigned to each Organisation Structure.
Room
Imports a list of Rooms into the system. Required if the college wants to use the timetable import.
Staff
Required by the system. The staff import creates staff user accounts including passwords. Staff Users can be associated with a teaching staff member. There is a distinction between users and staff in the system. Users do not need to be staff and staff do not need to be users. A user can log into the system and in most cases will be a teaching staff. However there may be users who are not teaching staff for example the IT Administrator or Head of Quality. On the flip side a college may have a member of teaching staff who is not a user of the system. This will mean that the member of staff can be used within the system but they will not be able to login.
Students
Required by the system. Sets up students and their accounts including passwords and permission groups. By assigning different students to different permission groups different ‘student types’ can be set up. These different types can have different ILPs. e.g. HE or FE.
Timetable
The timetable import will import each Lesson Date, Start Time, End Time, Room and Teacher for each Group. This allows staff to be able to log in and see their groups and students.
Other Users
Allows other types of users to be imported into the system e.g. parents , etc
Recommended Order Import
The order in which the imports are imported is important as imports rely on other data being present and should be as follows.
View pending emails and emails sent. Allows the system to be setup to send emails.
View pending SMS and SMSs sent. Allows the system to be setup to send SMSs.
Allows Message Creators to be generated which allows you to create your own custom emails or sms to be sent out on an adhoc basis or scheduled periodically.
View the status of the Process Agent. The Process Agent performs various background jobs including imports and sending messages.
View and edit system settings which change the overall functionality of the system.
System settings used in ILP Live include:
A college can change the theme of the website including colours, the name of Journey Live and images.
View audit log changes
View resources.
View details error log and system status.
Managers can see their particular areas. Please see the General documentation for more information about how to use the Organisation Structure page.
This screen allows academic years to be turned on or off and information copied between academic years such as the Page Creator and templates.
Please see the General documentation for more information about how to use the Academic Years page.